
Solana Program Verification for Legacy Anchor Versions
Step-by-step instructions for creating verified builds of Solana programs using solana-verify, including multisig support and troubleshooting.
Introduction
Verified builds are essential for establishing trust in Solana programs. When users interact with your program, they want assurance that the on-chain bytecode matches your public source code. This verification is displayed as a "Verified" badge on explorers like Solana Explorer, SolanaFM, and SolScan.
Starting with Anchor 0.32.0, the verification process was significantly simplified with native solana-verify integration. However, many production programs were deployed with earlier Anchor versions (0.29.x, 0.30.x, 0.31.x) and still require verification.
This guide covers the verification process for programs built with Anchor versions prior to 0.32.0.
What Changed in Anchor 0.32.0
Before diving into legacy verification, it is important to understand what changed:
| Aspect        | Before 0.32.0                        | After 0.32.0            |
|---------------|--------------------------------------|-------------------------|
| Build Tool    | solanafoundation/anchor Docker image | solana-verify           |
| Verification  | Manual process                       | anchor verify command   |
| IDL Upload    | Separate step                        | Automatic on deploy     |
| Compatibility | Version-specific images              | Unified tooling         |
If you try to verify a program built before 0.32.0 using the newest Anchor CLI, the verification will fail due to differences in how builds are created.
Prerequisites
Before starting, ensure you have the following:
Required Tools
# Docker (required for reproducible builds)
docker --version
docker ps

# solana-verify CLI
cargo install solana-verify
solana-verify --version

# Solana CLI
solana --version
Project Requirements
- Access to the exact source code commit that was deployed
- The program's
Cargo.lockfile (runcargo generate-lockfileif missing) - Approximately 0.01 SOL for on-chain verification fees
- Your program ID
Gather Required Information
Before proceeding, collect these values:
# Navigate to your project
cd /path/to/your/program

# Get the commit hash of deployed code
git rev-parse HEAD
# Example output: abc123def456...

# Identify your library name from Cargo.toml
grep "name" programs/YOUR_PROGRAM/Cargo.toml
# Example output: name = "your_program"
Variables used in this guide:
| Variable     | Description                          | Example                       |
|--------------|--------------------------------------|-------------------------------|
| PROGRAM_ID   | Your deployed program address        | 6X57Yp...vXRh                 |
| LIBRARY_NAME | Name from Cargo.toml (underscores)   | your_program                  |
| MOUNT_PATH   | Path to program in repo              | programs/your-program         |
| REPO_URL     | GitHub repository URL                | github.com/org/repo           |
| COMMIT_HASH  | Git commit of deployed code          | abc123def456...               |
| RPC_URL      | Solana RPC endpoint                  | api.mainnet-beta.solana.com   |
Step 1: Build the Verifiable Program
Create a reproducible binary using Docker that matches the on-chain program.
Option A: Using Anchor (Recommended for Anchor projects)
anchor build --verifiable
Option B: Using solana-verify directly
solana-verify build --library-name <LIBRARY_NAME>
The output will be in target/verifiable/<LIBRARY_NAME>.so or target/deploy/<LIBRARY_NAME>.so.
Verify the Build Hash
Get the hash of your local binary:
solana-verify get-executable-hash target/deploy/<LIBRARY_NAME>.so
Compare with the on-chain program:
solana-verify get-program-hash \
  --url <RPC_URL> \
  <PROGRAM_ID>
If the hashes do not match, the deployed program was not built verifiably. You will need to rebuild and redeploy to a new program ID.
Step 2: Deploy (If Not Already Deployed)
If you need to deploy or upgrade your program:
# Write to buffer first (recommended for large programs)
solana program write-buffer target/deploy/<LIBRARY_NAME>.so
# Returns: Buffer address

# Deploy using the buffer
solana program deploy \
  --program-id target/deploy/<LIBRARY_NAME>-keypair.json \
  --buffer <BUFFER_ADDRESS>
Step 3: Local Verification
Verify locally by building from your GitHub repository and comparing hashes:
solana-verify verify-from-repo \
  --url <RPC_URL> \
  --program-id <PROGRAM_ID> \
  <REPO_URL> \
  --commit-hash <COMMIT_HASH> \
  --library-name <LIBRARY_NAME>
Additional Flags
If your program uses feature flags:
solana-verify verify-from-repo \
  --url <RPC_URL> \
  --program-id <PROGRAM_ID> \
  <REPO_URL> \
  --commit-hash <COMMIT_HASH> \
  --library-name <LIBRARY_NAME> \
  -- --features mainnet
On-Chain Upload Prompt
After successful verification, you will see:
Program hash matches.
Would you like to upload the verification data on-chain?
Answer yes to create a PDA via OtterSec's verify program. This is required for remote verification and incurs a small SOL fee.
Step 4: Remote Verification (Recommended)
Submit a job to OtterSec's API for third-party verification. This marks your program as "verified" in explorers.
solana-verify verify-from-repo --remote \
  --url <RPC_URL> \
  --program-id <PROGRAM_ID> \
  <REPO_URL> \
  --commit-hash <COMMIT_HASH> \
  --library-name <LIBRARY_NAME>
Check Job Status
Remote verification can take 20-60 minutes due to Docker builds:
solana-verify remote get-job-status --job-id <JOB_ID>
Repeat until the job completes.
Resubmit Failed Jobs
If a job fails:
solana-verify remote submit-job \
  --program-id <PROGRAM_ID> \
  --uploader <YOUR_WALLET_ADDRESS>
Step 5: Verify Success
Check your program's verification status:
- Solana Explorer:
https://explorer.solana.com/address/<PROGRAM_ID> - OtterSec Status:
https://verify.osec.io/status/<PROGRAM_ID> - SolanaFM:
https://solana.fm/address/<PROGRAM_ID> - SolScan:
https://solscan.io/account/<PROGRAM_ID>#programVerification
Look for the "Verified" badge on these explorers.
Multisig (Squads) Verification
If your program's upgrade authority is a Squads multisig, the process requires additional steps.
Step 1: Run Local Verification
Run local verification with a local wallet. The upload will fail, but the hash check will succeed:
solana-verify verify-from-repo \
  --url <RPC_URL> \
  --program-id <PROGRAM_ID> \
  <REPO_URL> \
  --commit-hash <COMMIT_HASH> \
  --library-name <LIBRARY_NAME>
Step 2: Export PDA Transaction
solana-verify export-pda-tx \
  <REPO_URL> \
  --program-id <PROGRAM_ID> \
  --commit-hash <COMMIT_HASH> \
  --library-name <LIBRARY_NAME> \
  --uploader <LOCAL_WALLET_ADDRESS> \
  --encoding base58 \
  --compute-unit-price 0
Step 3: Simulate Transaction
solana-verify simulate-tx <BASE58_TX> --url <RPC_URL>
Step 4: Submit via Squads
- Go to Squads Protocol
- Use the transaction builder to submit the exported transaction
- Approve and execute with your multisig
Step 5: Remote Verification with Multisig
solana-verify verify-from-repo --remote \
  --url <RPC_URL> \
  --program-id <PROGRAM_ID> \
  <REPO_URL> \
  --commit-hash <COMMIT_HASH> \
  --library-name <LIBRARY_NAME> \
  --uploader <MULTISIG_ADDRESS>
Troubleshooting
Slow Build Times
M-series Macs emulate x86 in Docker, causing significant delays (20-60 minutes). Options:
- Allocate more RAM/CPU in Docker settings
- Use a Linux VM or cloud instance for builds
- Be patient
Hash Mismatch
Common causes:
- Wrong commit hash: Ensure you are using the exact commit that was deployed
- Missing features: Check if mainnet/devnet features were used during original build
- Library name mismatch: Use underscores, not hyphens (e.g.,
your_programnotyour-program) - Different Anchor version: The build must use the same Anchor version as the original deployment
RPC Errors
- Use a reliable RPC provider (QuickNode, Helius, Triton)
- For large programs, consider using
--url mainnet-betaflag
Job Stuck or Failed
- Check status periodically with
get-job-status - Resubmit if necessary
- OtterSec builds can take time due to queue
Alternative Verification Method
For Anchor programs, you can also try:
anchor verify -p <LIBRARY_NAME> <PROGRAM_ID>
Best Practices
- Document your deployment: Record the exact commit hash, Anchor version, and any feature flags used
- Verify immediately after deployment: Do not wait until later when you might forget details
- Use consistent tooling: Keep your local environment matching your CI/CD
- Store Cargo.lock: Always commit your
Cargo.lockfile for reproducible builds
Conclusion
Program verification is a critical step in establishing trust with your users. While the process for legacy Anchor versions requires more manual steps than newer versions, it is straightforward once you understand the workflow.
For new deployments, consider upgrading to Anchor 0.32.0 or later to take advantage of the simplified verification process with native solana-verify integration.
This guide covers verification for Anchor versions prior to 0.32.0. For programs built with 0.32.0 or later, use anchor verify directly.
Technologies Used
DevOps & Cloud
Other
Related Projects
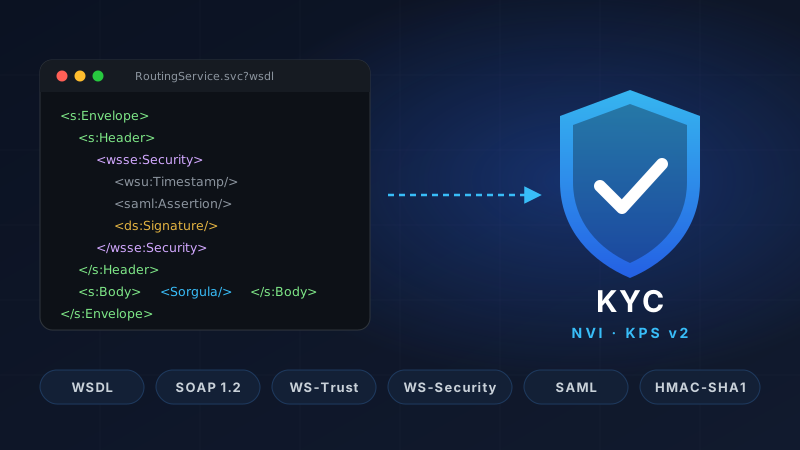
KPS Tester: Debugging Türkiye's Identity Verification Service
A single Python script that runs the full NVI KPS v2 flow from your terminal — WS-Trust token, HMAC-SHA1 signed query, verification across citizen, Blue Card and foreigner registries — and shows exactly what went over the wire.
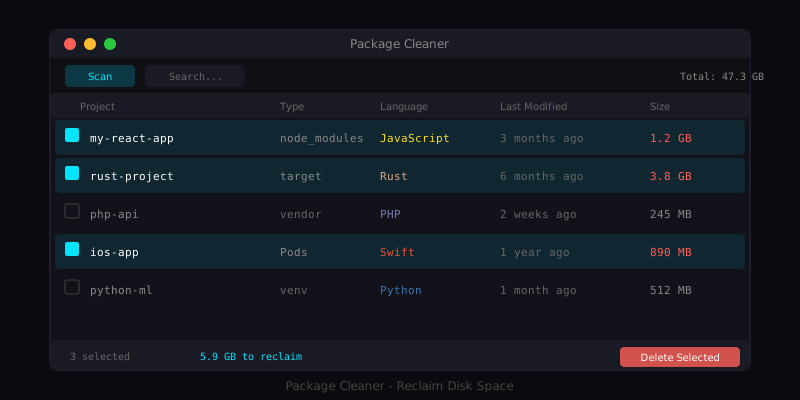
Package Cleaner for macOS
A native macOS application that helps developers reclaim disk space by finding and removing package dependency directories.
Have a project in mind?
Let's work together to bring your ideas to life. Our team of experts is ready to help you build something amazing.