
Analytics Without the Cookie Banner: Self-Hosting Umami Under Your Own Subdomains
How to run one self-hosted, cookieless Umami analytics instance for all your websites, each served from its own first-party stats subdomain: Docker Compose and PostgreSQL, an allow-list nginx block, a private dashboard, a privacy checklist, and what the cookie and GDPR rules actually say about consent.
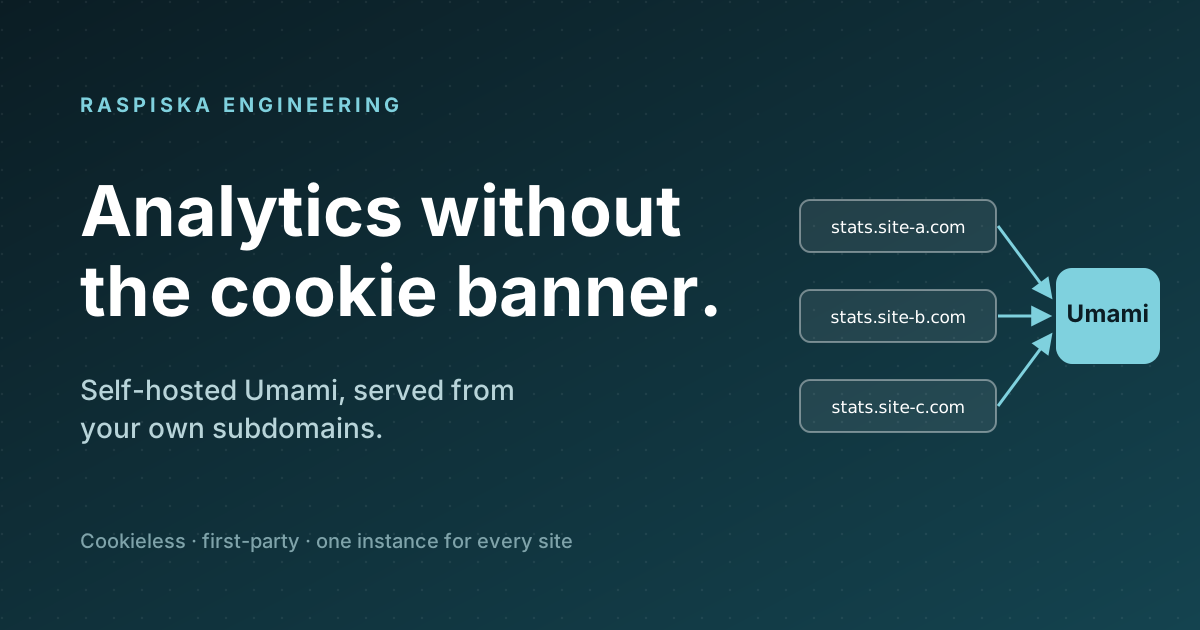
Most of us do not want to track people. We want to know whether the new pricing page gets read, which articles bring readers in, and whether last week's launch moved anything. That is aggregate, boring, useful information.
The usual way to get it, a third-party analytics script, drags in cookies, a consent banner, a pile of personal data sitting on someone else's servers, and a script that many browsers and extensions block on sight. You end up with less data, more legal surface, and a worse experience for your visitors.
This post is about a smaller setup: one self-hosted, cookieless Umami instance that serves all of your sites, each from its own first-party subdomain. It is simple to run, it keeps the data on your own server, and it gets you the numbers you actually need.
What changes when analytics is cookieless and self-hosted
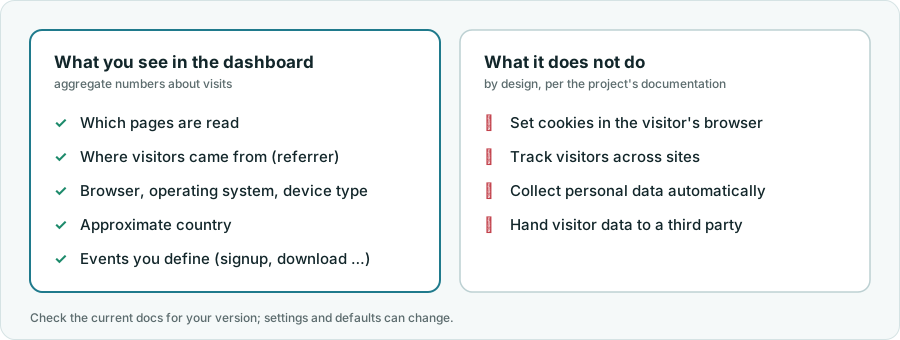
Umami's documentation describes it as working without cookies, cross-site tracking or the automatic collection of personal data. It records what you would expect from simple analytics: pageviews, referrers, browser, operating system, device type and approximate location. What you choose to send on purpose, such as a distinct ID or event properties, is your responsibility. And because you run it yourself, visitor data stays on your own server.
That is a different product from a cross-site tracker. It answers "what happens on my site", not "who is this person and where else do they go".
One instance, many first-party names
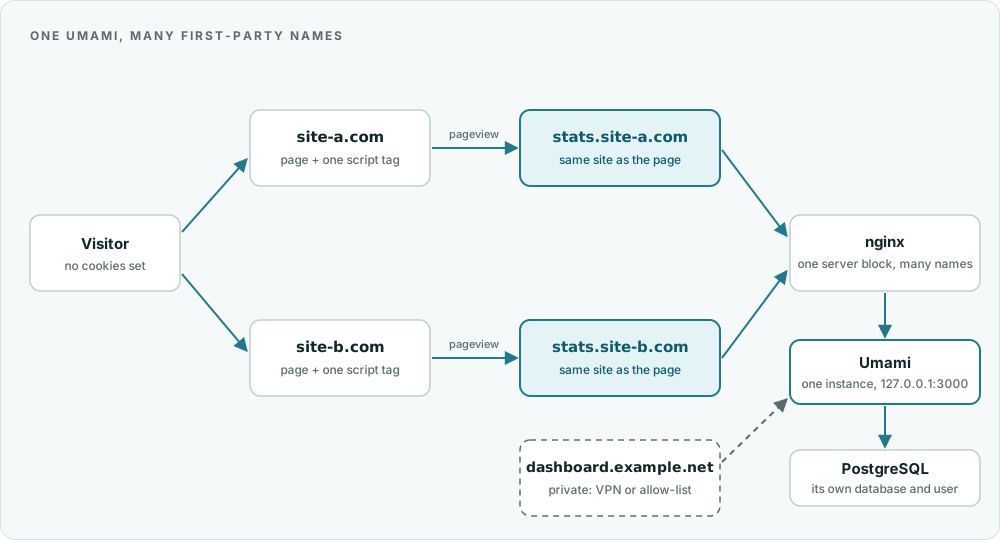
The trick is how the tracker is served. Instead of loading a script from analytics-vendor.example, each site loads it from
a subdomain of itself: stats.site-a.com for site A, stats.site-b.com for site B. To the browser that is the
same site, not a third party. Behind the scenes, all of those names point at one Umami.
That gives you:
- One thing to run. One Umami, one database, one backup, one set of updates. Add a new site by adding a name.
- First-party delivery. The tracker lives on the site's own domain, so it is not on the lists of well-known third-party analytics hosts.
- A small public surface. The public
stats.*names only need to expose the tracker script and the endpoint it posts to. The dashboard sits on a separate, private hostname.
Setting it up
Everything below follows Umami's documentation. Use your own domains, pin versions you have tested, and try it on a staging name first.
1. Umami and its database
Umami needs PostgreSQL (the docs list v12.14 or newer) and a single required setting, DATABASE_URL. A minimal
docker-compose.yml:
services:
  umami:
    image: docker.umami.is/umami-software/umami:latest   # pin a tested version in real life
    restart: unless-stopped
    ports: ["127.0.0.1:3000:3000"]        # only the local reverse proxy can reach it
    environment:
      DATABASE_URL: postgresql://umami:${UMAMI_DB_PASSWORD}@db:5432/umami
      APP_SECRET: ${UMAMI_APP_SECRET}      # a random string: openssl rand -hex 32
      TRACKER_SCRIPT_NAME: pulse.js        # instead of the default script.js
      DISABLE_TELEMETRY: "1"
    depends_on:
      db:
        condition: service_healthy
  db:
    image: postgres:16-alpine
    restart: unless-stopped
    environment:
      POSTGRES_USER: umami
      POSTGRES_PASSWORD: ${UMAMI_DB_PASSWORD}
      POSTGRES_DB: umami
    volumes: ["umami-db:/var/lib/postgresql/data"]
    healthcheck:
      test: ["CMD-SHELL", "pg_isready -U umami -d umami"]
      interval: 5s
      retries: 10
volumes:
  umami-db:
Put the two secrets in an .env file next to it, not in the compose file. The first login is admin / umami.
Change that password before anything else. If you already run a shared PostgreSQL, give Umami its own database and
user instead of running a second database.
Umami can also rename the endpoint the tracker posts to (COLLECT_API_ENDPOINT). That is optional; whether you use it
or not, the next steps tell you how to find out which path your setup actually uses.
2. One nginx block, many names
# Public, first-party names: one block, one name per site.
server {
    listen 80;
    server_name stats.site-a.com stats.site-b.com stats.site-c.com;

    location = /pulse.js {                       # the tracker script
        proxy_pass http://127.0.0.1:3000;
        proxy_set_header Host $host;
        proxy_set_header X-Forwarded-For $proxy_add_x_forwarded_for;
        proxy_set_header X-Forwarded-Proto $scheme;
    }
    location = /api/send {                       # where the tracker posts (check yours, see below)
        limit_except POST OPTIONS { deny all; }
        proxy_pass http://127.0.0.1:3000;
        proxy_set_header Host $host;
        proxy_set_header X-Forwarded-For $proxy_add_x_forwarded_for;
        proxy_set_header X-Forwarded-Proto $scheme;
    }
    location / { return 404; }                   # nothing else is public
}

# Private: the dashboard, reachable only from your VPN or office.
server {
    listen 80;
    server_name dashboard.example.net;
    allow 203.0.113.0/24;                        # your VPN or office range
    deny all;
    location / {
        proxy_pass http://127.0.0.1:3000;
        proxy_set_header Host $host;
        proxy_set_header X-Forwarded-For $proxy_add_x_forwarded_for;
        proxy_set_header X-Forwarded-Proto $scheme;
    }
}
Two things matter here. First, the public names are an allow-list: the script and the collection endpoint, nothing else, so the login page and the API are not exposed on the public internet. Second, the dashboard is not on a public name at all.
If a CDN or another proxy sits in front of nginx, tell Umami how to find the real visitor address (CLIENT_IP_HEADER)
and which proxies to trust (TRUSTED_PROXIES), or your visitors will all appear to come from your own proxy. Both are in
Umami's environment-variable docs.
3. DNS and TLS
Create a stats record under each site's domain pointing at the server (an A or CNAME record), and terminate TLS the way
you already do: per-name certificates, or your CDN. Nothing here is special to Umami.
4. Add the site and the tag
In the dashboard, add each website once: Umami gives you a website ID. Then one line goes into the site's <head>:
<script defer
        src="https://stats.site-a.com/pulse.js"
        data-website-id="YOUR-WEBSITE-ID"
        data-domains="site-a.com,www.site-a.com"
        data-exclude-search="true"
        data-do-not-track="true"></script>
A few of those attributes are doing real work:
data-domainsmakes the tracker run only on the hostnames you list, so a copied page elsewhere does not pollute your numbers.data-exclude-searchdrops URL query strings, which is where tokens, email addresses and other things that should never be in analytics tend to leak.data-do-not-trackskips visitors whose browser sends a Do Not Track signal. You are not obliged to, but it is a cheap way to respect an explicit preference.
Because the script comes from the stats subdomain, the tracker sends its data back to the same place and you do not
need data-host-url.
5. Check what really happens
Open the site with your browser's developer tools on the Network tab, reload, and look for two requests: the script
(pulse.js) and the POST that follows it. The POST path is the one your nginx block must allow. If it is not
/api/send, change the location in the block above to match, or remove the rename and use Umami's default path. Then
confirm the dashboard shows your visit, and that visiting https://stats.site-a.com/ itself gives a plain 404.
Keeping it privacy-friendly
Self-hosting and no cookies are a good start, not a guarantee. A short checklist:
- [ ] Change the default admin password, and keep the dashboard on a private hostname.
- [ ] Use
data-exclude-searchso query strings never reach the dashboard. - [ ] Do not send names, emails or other personal data in custom events, and think twice before identifying logged-in users.
- [ ] Exclude your own traffic (
IGNORE_IPtakes a list of addresses and ranges). - [ ] Decide how long you keep data, write it down, and delete on that schedule.
- [ ] Back up the database like any other production database, and keep the instance updated.
- [ ] Say what you measure in your privacy policy, in plain words.
Do you really get to drop the banner?
Maybe, and it depends on what you run. The honest version:
- The rules have two layers. One covers storing or reading anything on a visitor's device (the "cookie law", the ePrivacy rules in the EU, PECR in the UK). The other covers processing personal data (GDPR and its equivalents, including KVKK in Turkey).
- A tracker that sets no cookies and keeps no personal identifiers for analytics purposes, with aggregate results only, is on much safer ground in both layers. Some regulators say so explicitly. France's CNIL, for example, publishes conditions under which audience measurement is exempt from consent: strictly for measuring your own audience, no cross-site tracking, limited data and retention, people informed and able to object. Other regulators are stricter or silent.
- Anything else on the page still counts. An embedded video, a chat widget, an ad pixel or a social button can set cookies on its own. Removing the banner only works if nothing on the page needs it.
- "Cookieless" is a property of your setup, not of a product name. If you add user identification or send personal data in events, the picture changes.
This is not legal advice. Check what your regulator and your lawyer say for the countries you serve, write down the decision and why you made it, and keep the setup boring enough to defend.
A note on blockers
First-party delivery means the tracker is not on the usual lists of third-party analytics domains. That is a fair thing to aim for: you are measuring your own site, on your own domain, with no data going anywhere else. It is not a promise. Some tools block by script name or request pattern, and some visitors block everything. Treat the numbers as a reliable trend, not an exact head count, and do not get into an arms race with people who have said no.
Wrapping up
One small server, one Postgres database, one reverse proxy block and one script tag per site. In return you get analytics you can explain in a single paragraph, on infrastructure you control, without a banner whose only job is to ask for permission you did not need.
If you try it, start with one site, check the network tab, and add the rest once you trust it.
Umami is an independent open-source project. Settings and defaults mentioned here follow its documentation at the time of writing; check the docs for your version.
Technologies Used
Database
DevOps & Cloud
Other
Related Projects
Releases, Not git pull: A Tiny Ansible Template for Atomic Deploys
Deploy into numbered release folders, switch one symlink, roll back in seconds. A small open-source Ansible role with an automatic rollback when the health check fails, explained step by step.
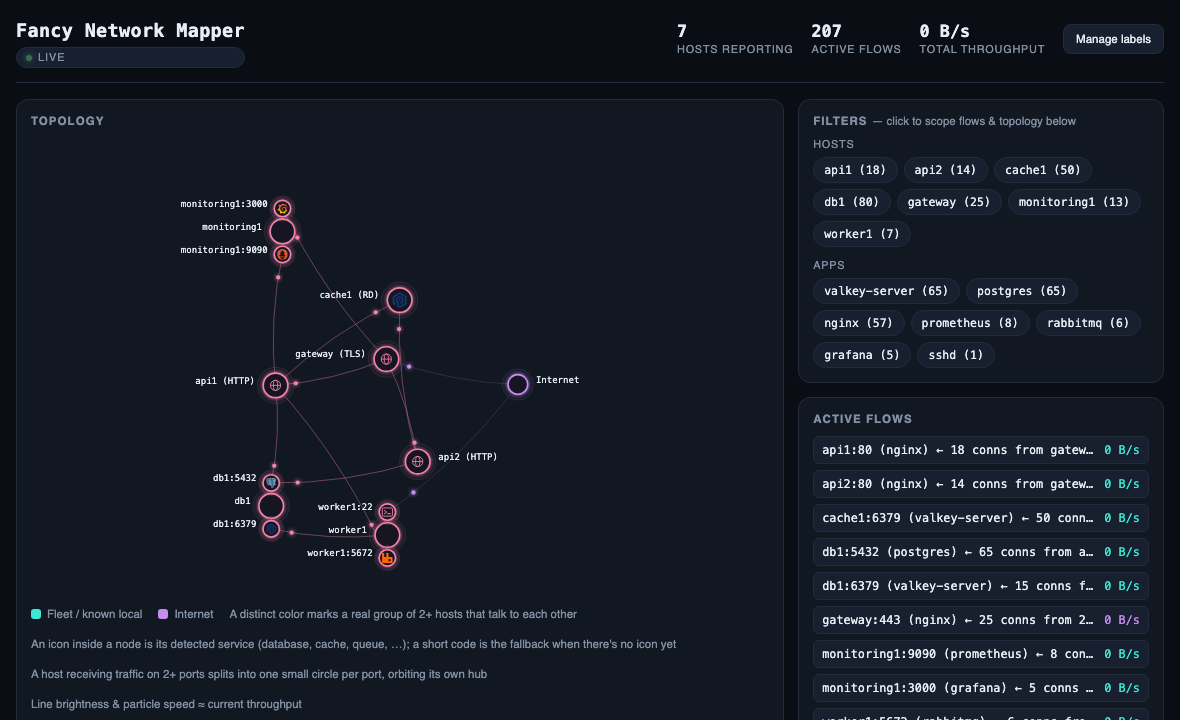
Fancy Network Mapper
I got tired of not knowing what my servers were talking to, so I built a tiny network mapper — two Go binaries that read the kernel's conntrack table and draw a live, force-directed map of who talks to whom across a fleet, with real throughput.
Have a project in mind?
Let's work together to bring your ideas to life. Our team of experts is ready to help you build something amazing.